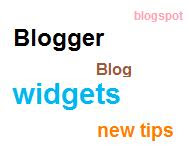
In this post i am going to show you a simpler way on how to add Label or Tag cloud to blogger or blogspot
Tag cloud or Label cloud is a visual depiction of all the tags or labels that are used on your blog...
Goto Your blogger Layout>Page Elements page and add a Labels Widget there..You can Do that using the add a Page Element Option on that page.
Choose to sort the labels Alphabetically when prompted.
You will find some code similar to
<b:widget id='Label1' locked='false' title='Labels' type='Label'/>
Now Replace that with
<b:widget id='Label1' locked='false' title='Label Cloud'
type='Label'>
<b:includable id='main'>
<b:if cond='data:title'>
<h2><data:title/></h2>
</b:if>
<div class='widget-content'>
<div id='labelCloud'/>
<p align='center'>
<script type='text/javascript'>
var cloudMin = 1;
var maxFontSize = 25;
var maxColor = [35,130,196];
var minFontSize = 10;
var minColor = [35,130,195];
var lcShowCount = false;
// Don't change anything past this point -----------------
// Cloud function s() ripped from del.icio.us
function s(a,b,i,x){
if(a>b){
var m=(a-b)/Math.log(x),v=a-Math.floor(Math.log(i)*m)
}
else{
var m=(b-a)/Math.log(x),v=Math.floor(Math.log(i)*m+a)
}
return v
}
var c=[];
var labelCount = new Array();
var ts = new Object;
<b:loop values='data:labels' var='label'>
var theName = &qout;<data:label.name/>&qout;;
ts[theName] = <data:label.count/>;
</b:loop>
for (t in ts){
if (!labelCount[ts[t]]){
labelCount[ts[t]] = new Array(ts[t])
}
}
var ta=cloudMin-1;
tz = labelCount.length - cloudMin;
lc2 = document.getElementById('labelCloud');
ul = document.createElement('ul');
ul.className = 'label-cloud';
for(var t in ts){
if(ts[t] < cloudMin){
continue;
}
for (var i=0;3 > i;i++) {
c[i]=s(minColor[i],maxColor[i],ts[t]-ta,tz)
}
var fs = s(minFontSize,maxFontSize,ts[t]-ta,tz);
li = document.createElement('li');
li.style.fontSize = fs+'px';
a = document.createElement('a');
a.title = ts[t]+' Posts in '+t;
a.style.color = 'rgb('+c[0]+','+c[1]+','+c[2]+')';
a.href = '/search/label/'+encodeURIComponent(t);
if (lcShowCount){
span = document.createElement('span');
span.innerHTML = '('+ts[t]+') ';
span.className = 'label-count';
a.appendChild(document.createTextNode(t));
li.appendChild(a);
li.appendChild(span);
}
else {
a.appendChild(document.createTextNode(t));
li.appendChild(a);
}
ul.appendChild(li);
abnk = document.createTextNode(' ');
ul.appendChild(abnk);
}
lc2.appendChild(ul);
</script>
</p>
<noscript>
<ul>
<b:loop values='data:labels' var='label'>
<li>
<b:if cond='data:blog.url == data:label.url'>
<data:label.name/>
<b:else/>
<a expr:href='data:label.url'><data:label.name/></a>
</b:if>
(<data:label.count/>)
</li>
</b:loop>
</ul>
<br/>Powered By:<small><a href='http://www.blogger-new-widgets.blogspot.com'>
Blogger Widgets</a></small>
<br/>Blogger Label Cloud:<small>
<a href='http://blogger-new-widgets.blogspot.com/2009/07/tag-label-
cloud-widget-for-blogger-or.html'>Label Cloud for Blogger</a></small>
</noscript>
<b:include name='quickedit'/>
</div>
</b:includable>
</b:widget>
Now find
]]></b:skin>
and replace it with
#labelCloud {text-align:center;font-family:arial,sans-serif;}
#labelCloud .label-cloud li{display:inline;background-image:none !important;padding:0 5px;margin:0;vertical-align:baseline !important;border:0 !important;}
#labelCloud ul{list-style-type:none;margin:0 auto;padding:0;}
#labelCloud a img{border:0;display:inline;margin:0 0 0 3px;padding:0}
#labelCloud a{text-decoration:none}
#labelCloud a:hover{text-decoration:underline}
#labelCloud li a{}
#labelCloud .label-cloud {}
#labelCloud .label-count {padding-left:0.2em;font-size:9px;color:#000}
#labelCloud .label-cloud li:before{content:"" !important}
]]></b:skin>
Save your template and now you should get a working Label Cloud On your Blog.
Changing Cloud Colours:
you can change those colors editing the code a little bit..
you will have to expand your widget templates and modify these 2 lines of code
var maxColor =
and
var minColor =
you have to specify the RGB values there separated by commas..If you are sure of what should be the hex codes of the maximum and minimum colors,then you can use this to convert the hex value to RGB values..If you are not sure of what the hex code of the colors are then have a look at this.
You can change the font sizes by editing these 2 lines of code
var minFontSize =
and
var maxFontSize =
This Tag Cloud Widget was originally developed by phydeaux3
Read More »
Tags:
Blogger Useful Widgets,
Widgets


